Overview
Setup Guide
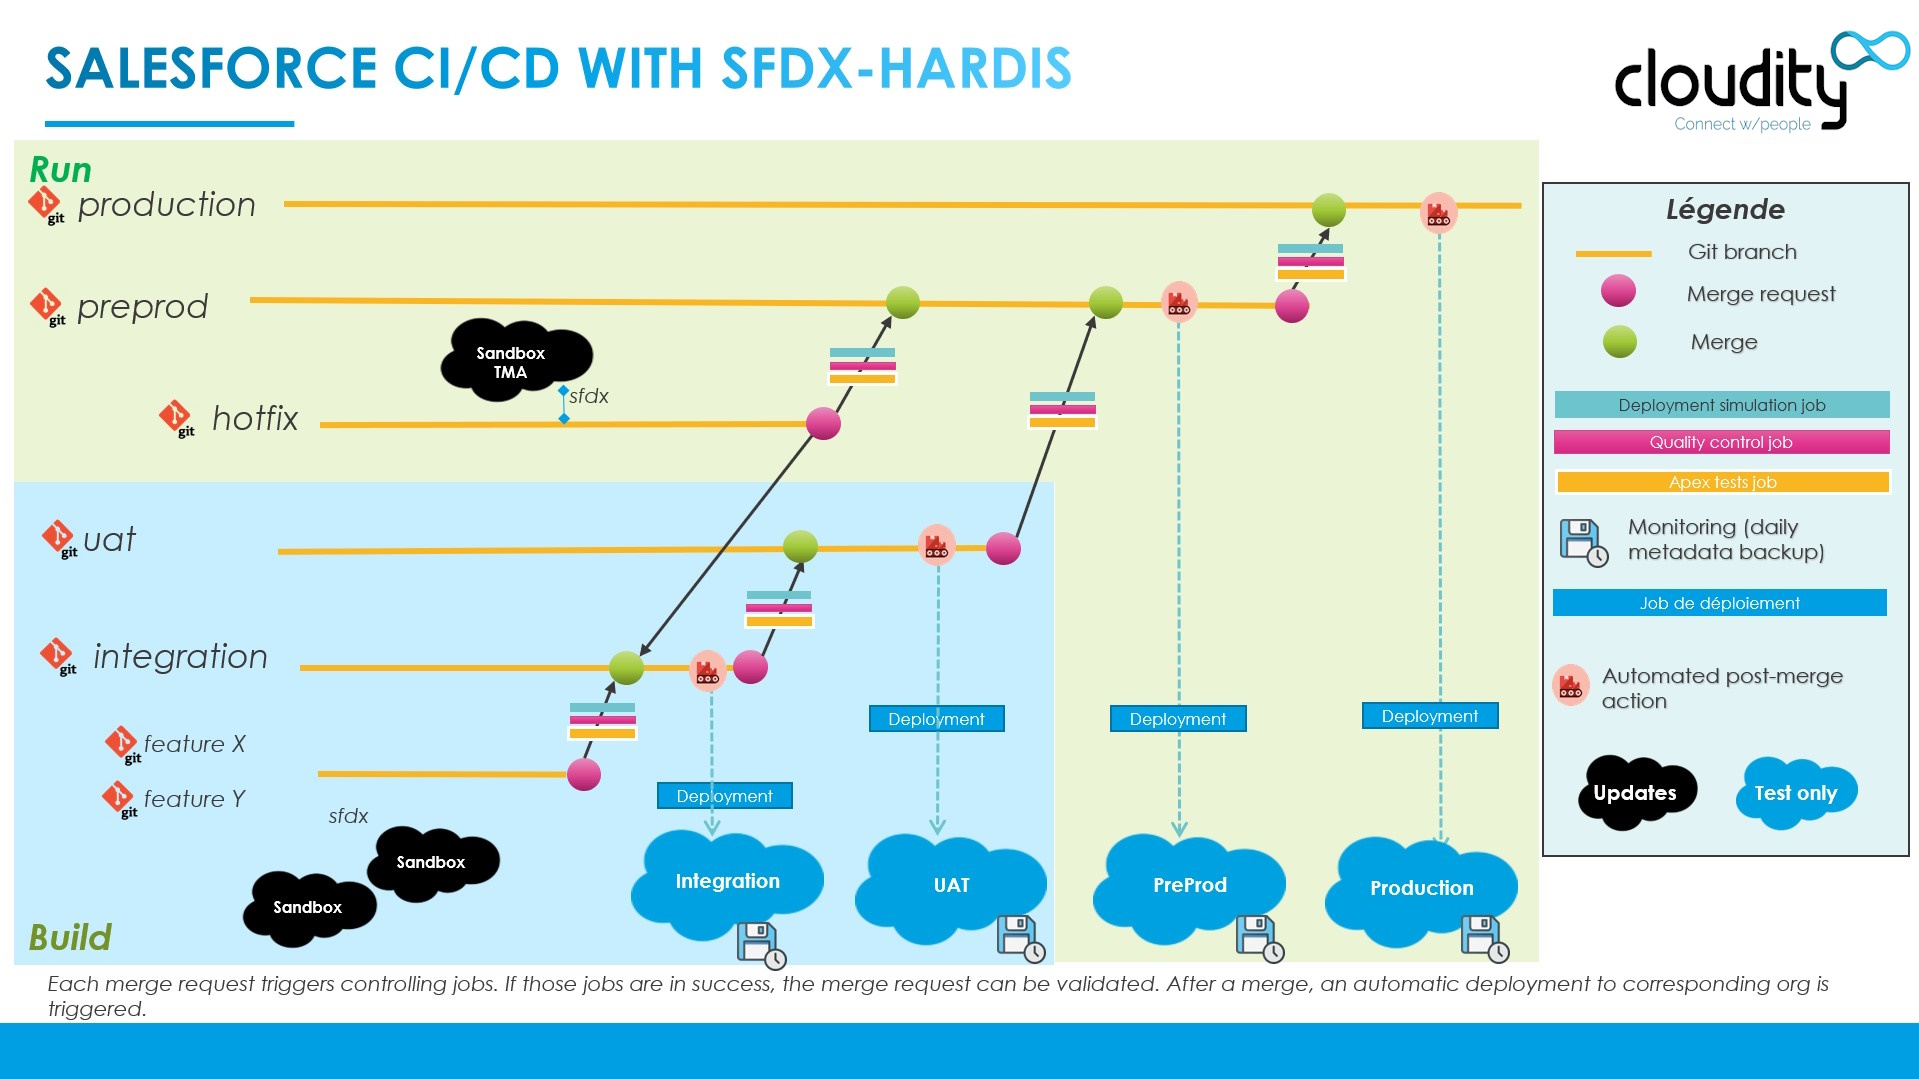
This guide takes you from an empty Git repository to a working CI/CD pipeline, with a first Pull Request validated and deployed. Count one to three days for a first setup, depending on your Git platform and the state of your production org.
Prerequisites
- Basic knowledge of Git and Salesforce DX. If you are new to them, these resources are a good start: Learn Git Branching and the Salesforce DX Trailmix.
- The tools installed on your computer: VS Code, the SFDX Hardis extension and its dependencies.
- An account on a Git platform (GitHub, GitLab, Azure DevOps, Bitbucket or Gitea) with CI runner minutes, or a Jenkins server.
- Administrator access to the Salesforce production org.
Setup steps
- Create the Git repository: create the repository and the major branches (
main,preprod,uat,integration...), protect them and define the merge rules. - Prepare the Salesforce orgs: activate Dev Hub and source tracking, create one sandbox per major branch.
- Initialize the SFDX project: generate the project structure and the CI/CD workflow files with
sf hardis:project:create. - Configure CI authentication: let the CI server connect to each major org with an External Client App and a JWT certificate.
- Retrieve an existing org (optional): bring the metadata of an existing production org into the repository, then clean it.
- Create the first Pull Request: merge the setup branch and get the validation jobs green.
Then:
- Configure the integrations: Pull Request comments, Slack or Teams notifications, Jira or Azure Boards, AI.
- Configure the project: overwrite management, delta deployments, automated cleaning and the other
.sfdx-hardis.ymlsettings. - Publish job artifacts: keep the detailed deployment reports after the jobs end (already done in recent pipeline templates).
- Go through the setup checklist: a complete list of what must be in place before the team starts.
Need help?
Cloudity, the company behind sfdx-hardis, offers an assisted setup and a full setup service. Community support is available through GitHub issues.