Install the tools
Install the tools
This page gets your computer ready to work on a Salesforce CI/CD project. You do it once, it takes about 15 minutes, and the VS Code SFDX Hardis extension installs most of the tools for you.
1. Uninstall the native Salesforce CLI installer
If you installed Salesforce DX or the Salesforce CLI with the Windows or Mac native installer, uninstall it first (on Windows: Settings > Apps > Installed apps). sfdx-hardis installs the Salesforce CLI with npm, and two installations on the same computer conflict with each other.
If you never installed the Salesforce CLI, skip this step.
2. Install Visual Studio Code
Download and install Visual Studio Code (VS Code). It is the editor you will use every day on the project.
Not using VS Code? The SFDX Hardis extension is fully compatible with every VS Code-based IDE: Agentforce Vibes IDE in your browser, Cursor, Windsurf, VSCodium and other VS Code forks. In these IDEs, install it from Open VSX instead of the Visual Studio Marketplace, then follow the same steps.
3. Install the VS Code SFDX Hardis extension
- Open VS Code.
- Open the Extensions view (click the Extensions icon in the left bar, or press
Ctrl+Shift+X). - Search for SFDX Hardis and click Install on the SFDX Hardis extension published by Nicolas Vuillamy.
4. Install the dependencies
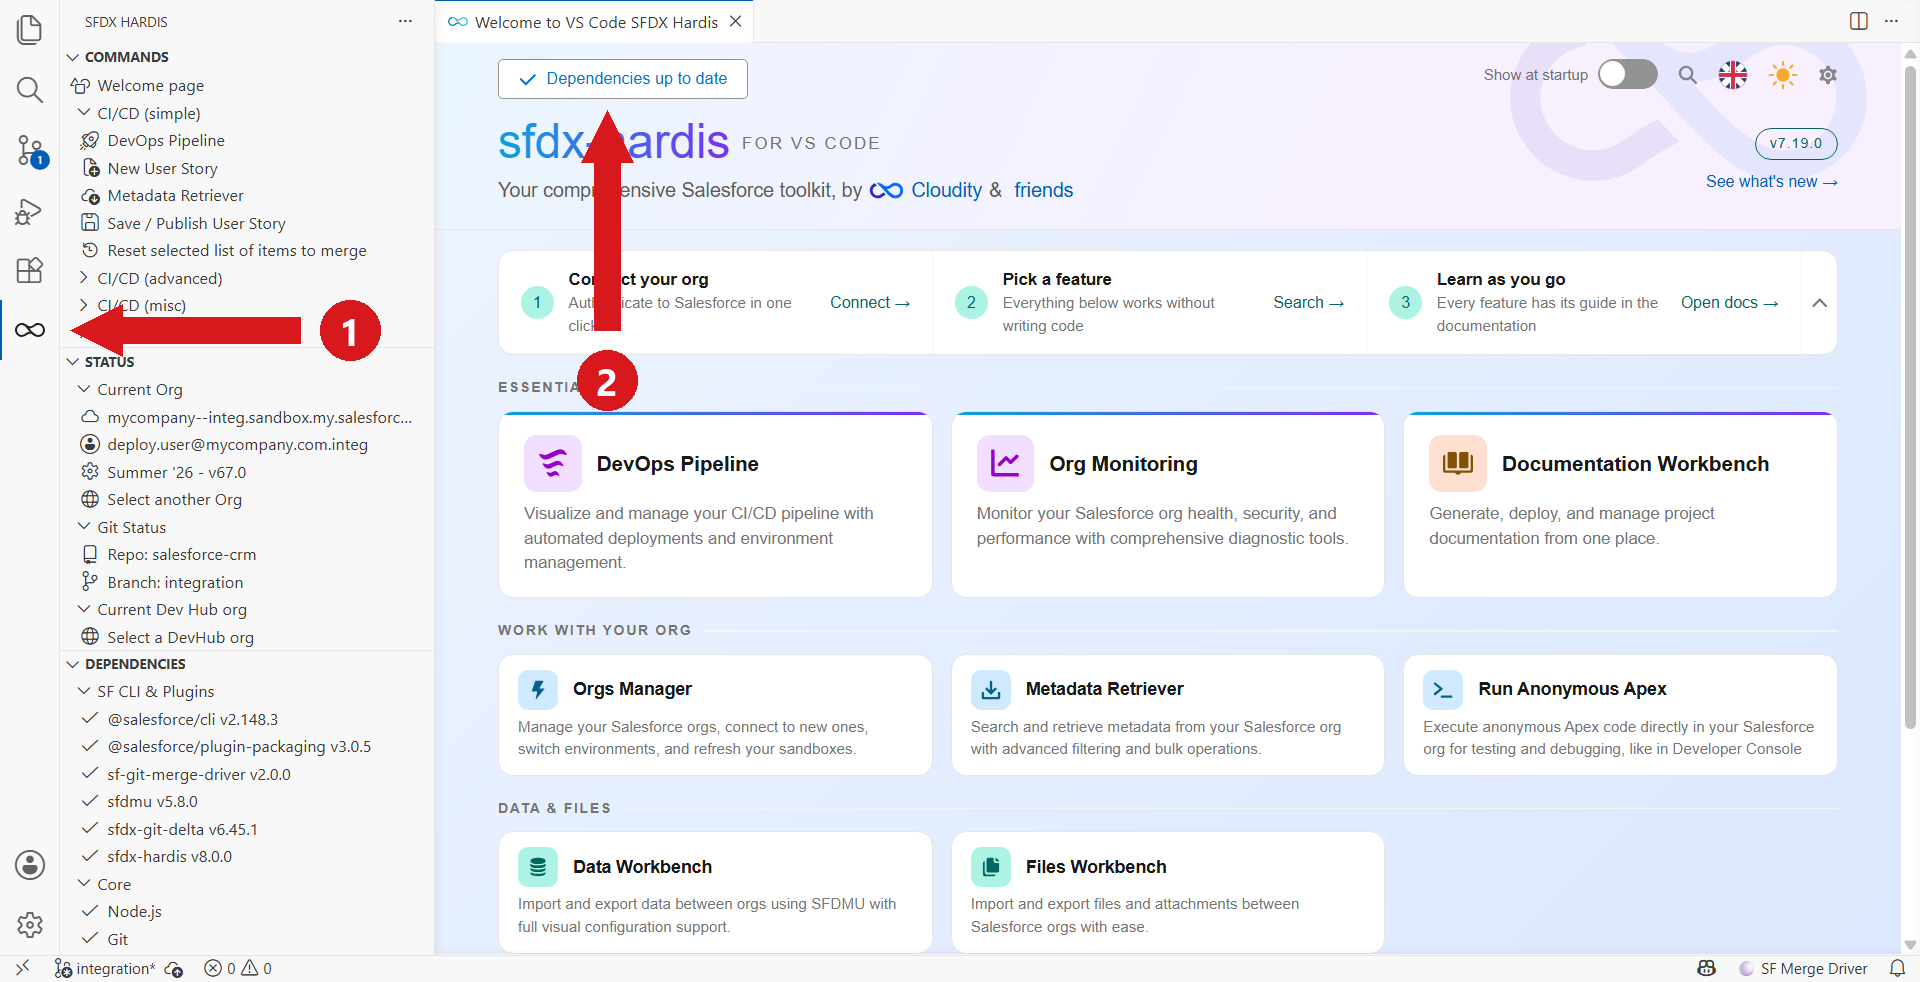
- Click the
 icon in the VS Code left bar to open the extension. The Welcome page opens.
 - Click Install dependencies on the Welcome page.
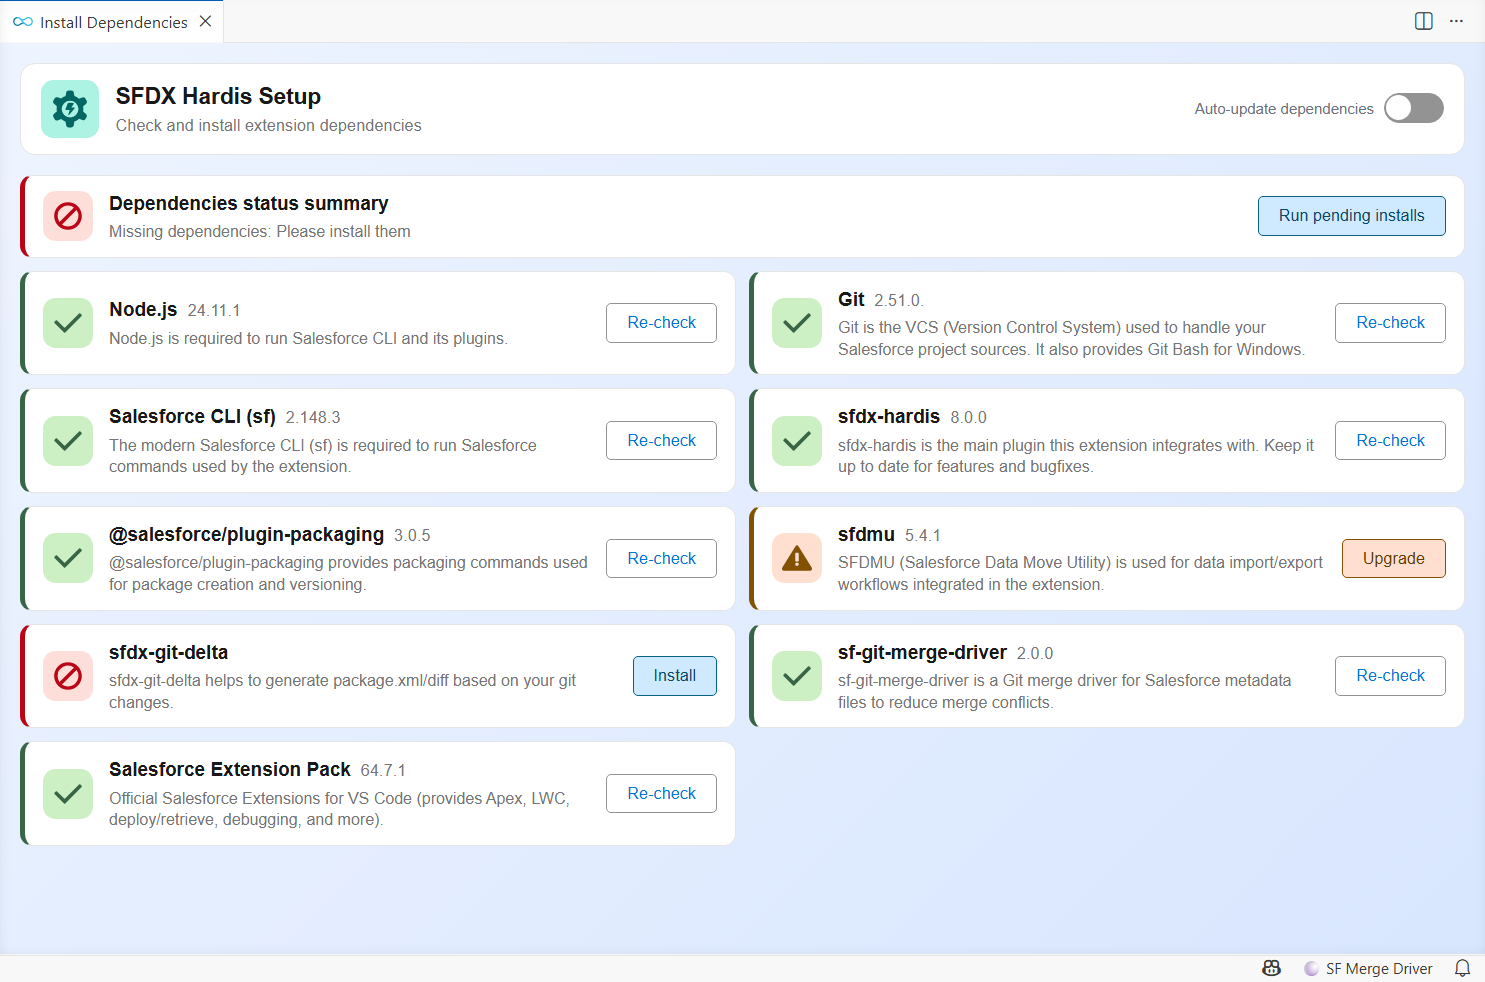
- The SFDX Hardis Setup panel lists every tool the extension needs, installs the missing ones and upgrades the outdated ones. Wait until every line is green.
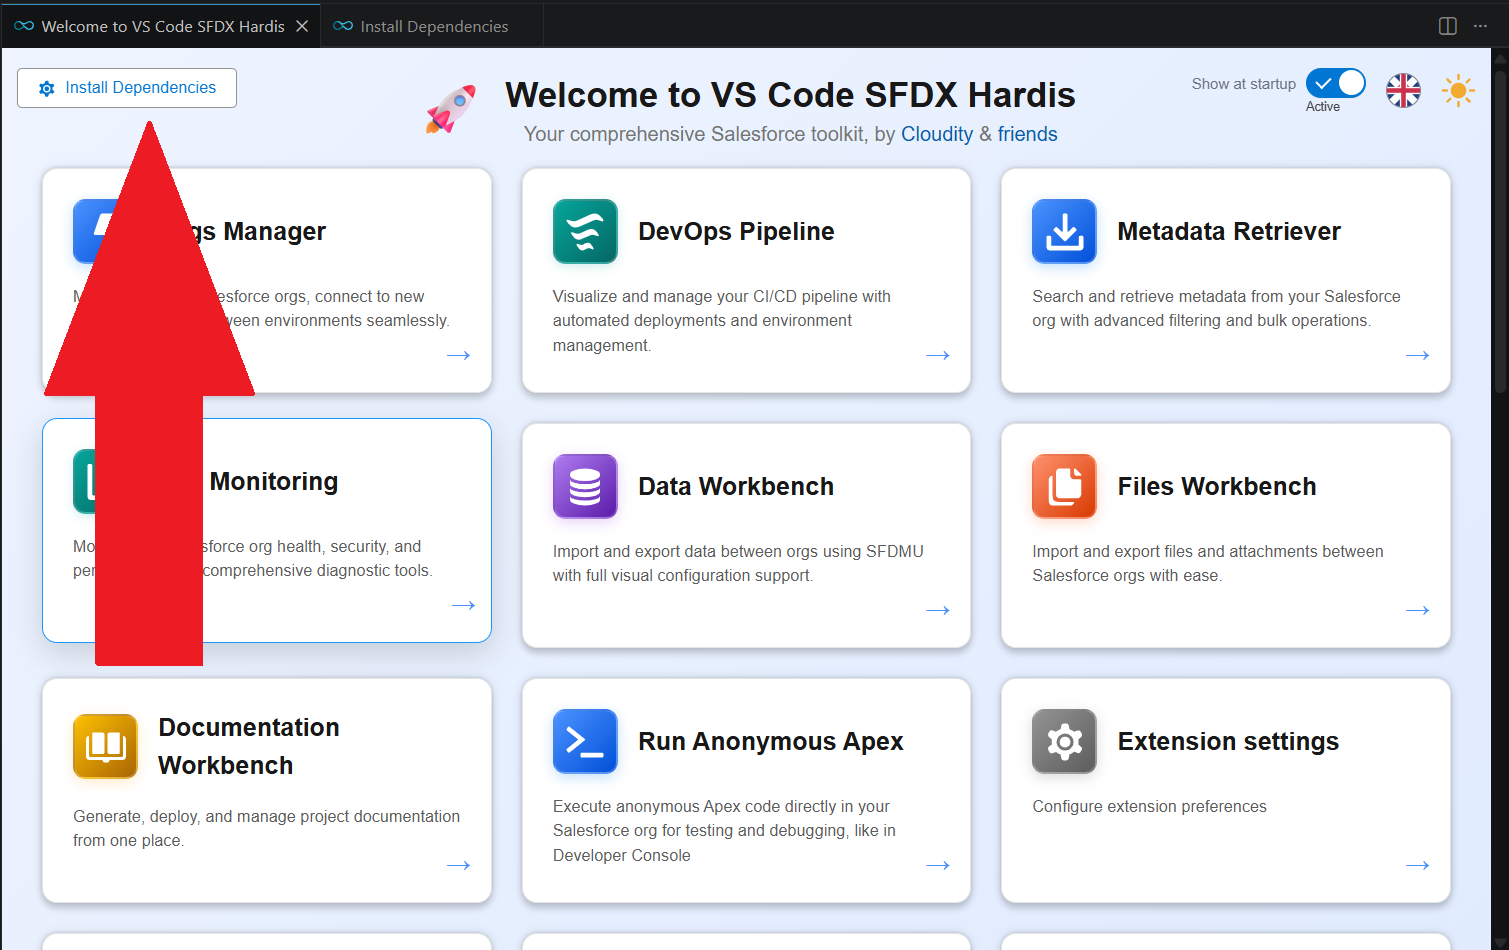
- You can open this panel again at any time from the Dependencies link of the Welcome page, for example when the extension tells you that a newer version of a tool is available.
Mac users: the Install and Upgrade buttons often fail silently on macOS because they need administrator rights. Read Mac users: install the dependencies from the Terminal below.
5. Check that everything is green
When the Setup panel shows no warning, your computer is ready.
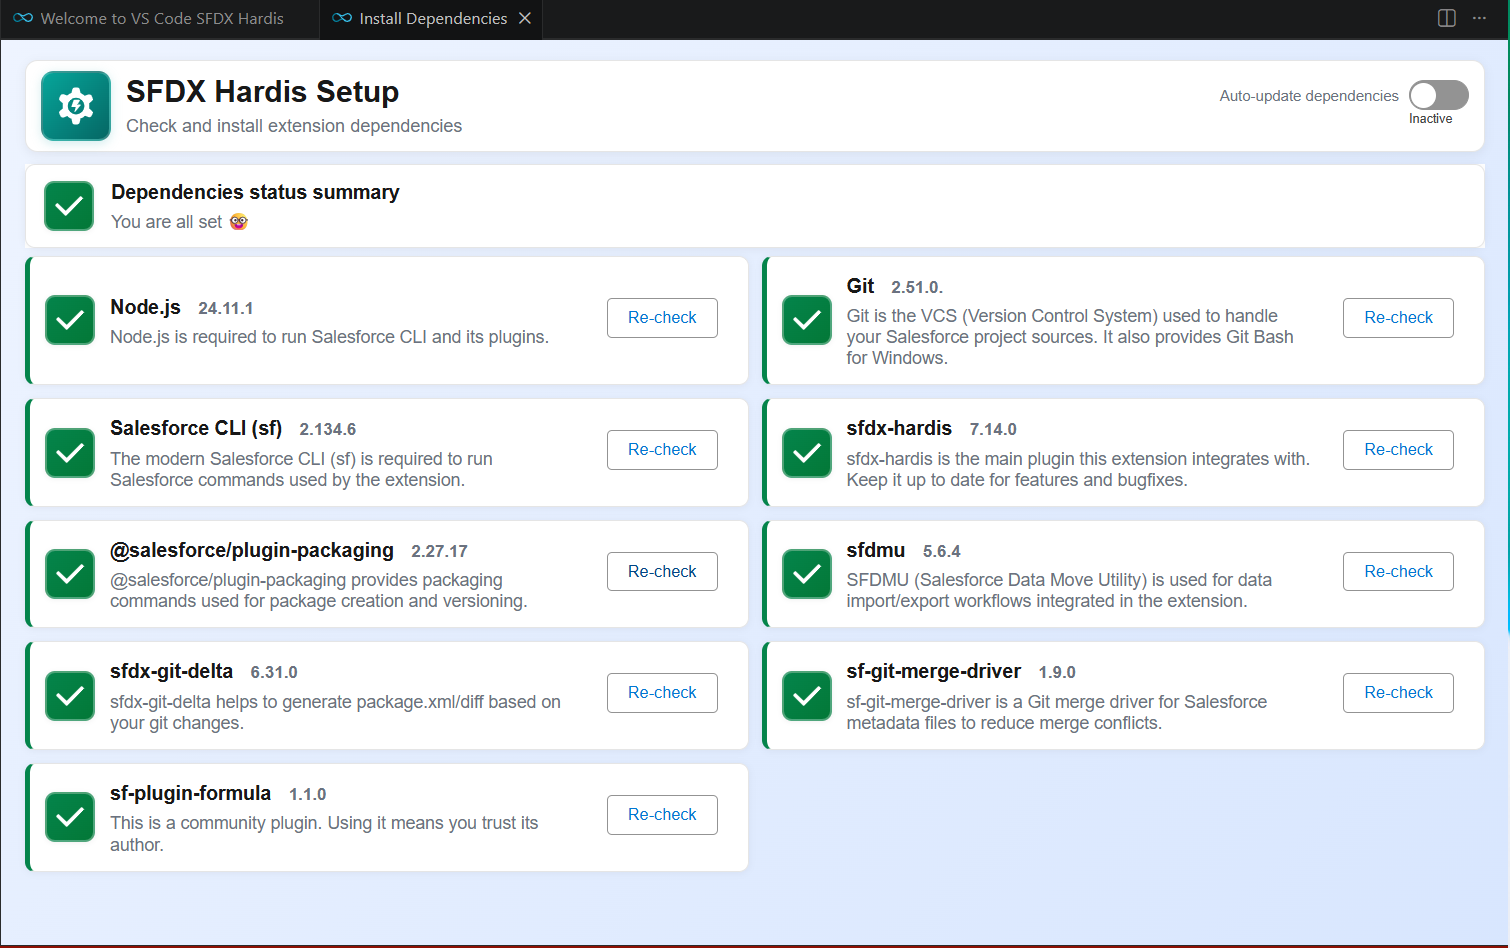
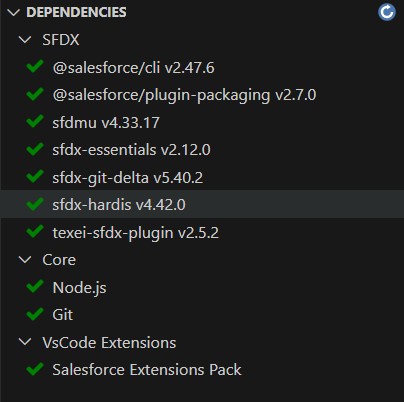
The Dependencies section of the SFDX Hardis side bar shows the same information in a compact way.
Under the hood
The installed tools are the following:
- Git
- Node.js
- Salesforce CLI (
sf)- Salesforce CLI plugins
- The Salesforce Extension Pack for VS Code
Optional: video tutorial
This video walks through the installation. It was recorded with the previous interface of the extension, so the screens look different, but the steps are the same.
Next step
Your computer is ready. Next: create a Git access token, then clone the repository of your project.
Mac users: install the dependencies from the Terminal
This section is for Mac users only. Windows and Linux users can skip it.
Why you need to do this manually
When you click the Install buttons in the SFDX Hardis Setup panel, VS Code runs commands like npm install @salesforce/cli -g and sf plugins install sfdx-hardis in the background.
On a Mac, these global installations need administrator rights (sudo). The background commands launched by VS Code cannot ask you for your password, so they fail silently or get stuck. You will see things like:
- The Setup panel keeps showing "missing" or "outdated" no matter how many times you click Install.
- Errors mentioning
EACCES,permission denied, or/usr/local/lib. - An install spinner that never finishes.
The solution is to open the Terminal and run the install commands yourself with sudo, so you can type your Mac password when asked.
Step 1: Open the Terminal app
Press Cmd + Space, type Terminal, and press Enter.
Step 2: Install the Salesforce CLI
In the Terminal, copy and paste this command and press Enter:
sudo npm install @salesforce/cli -g
- The Terminal asks for your Mac password. Type it and press
Enter. - You will not see the characters as you type the password. This is normal: keep typing and press
Enterwhen done. - Wait until the command is finished (it can take a minute or two).
Check that it worked:
sf --version
Step 3: Install the sfdx-hardis plugin and the other Salesforce CLI plugins
Still in the Terminal, copy and paste these commands one by one (press Enter after each, and type your password again if asked):
sudo sf plugins install sfdx-hardis
sudo sf plugins install @salesforce/plugin-packaging
sudo sf plugins install sfdmu
sudo sf plugins install sfdx-git-delta
sudo sf plugins install sf-git-merge-driver
If the Terminal asks Do you want to continue? (y/n), type y and press Enter.
Step 4: Go back to VS Code
- Quit VS Code completely (
Cmd+Q) and reopen it, so it picks up the newly installed tools. - Open the SFDX Hardis Setup panel again. Every item should now be green.
Upgrading later
When sfdx-hardis tells you that a new version of a plugin is available, do not click the Upgrade button in VS Code (it fails silently for the same reason). Instead, open the Terminal again and run the matching sudo sf plugins install ... command from Step 3. To upgrade the Salesforce CLI itself, run the command from Step 2 again.